Life cycles relay game
A fun, outdoor activity to help you explore a variety of different life cycles, many of which you may find in your own school grounds.
You will need (per group of 30):
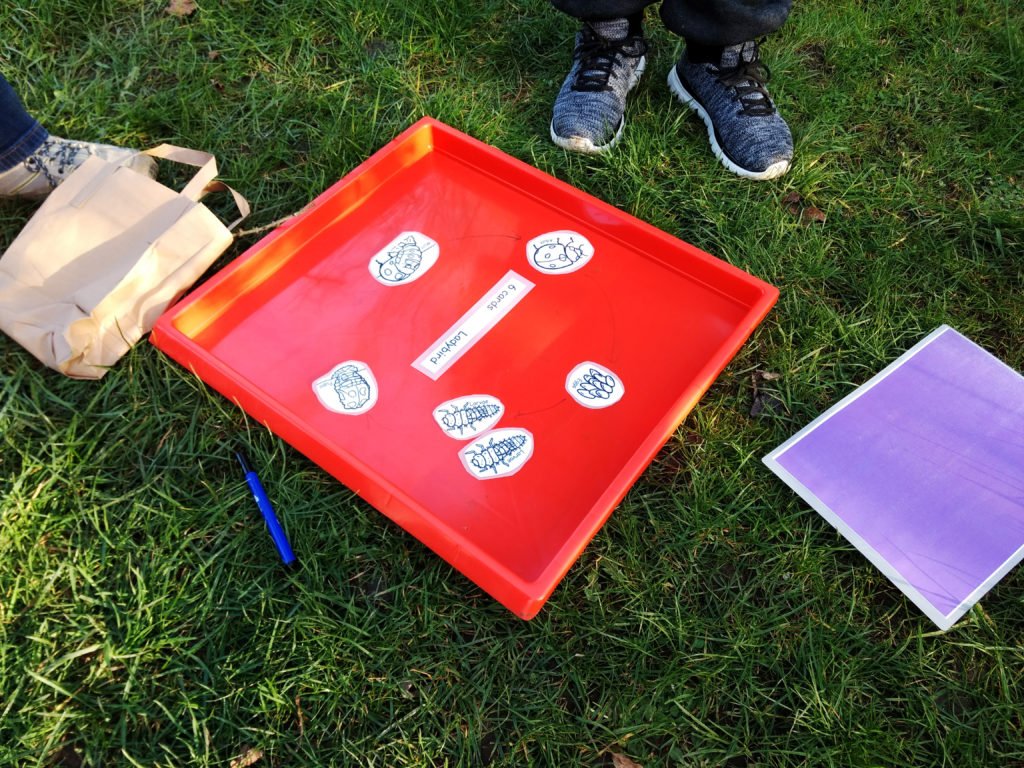
- 6 x Gratnells Art Trays
- 6 x 6-section tray inserts
- 2 x Life cycle diagrams for six different species <hyperlink blue font to download>
- 6 x Dry wipe pens in colours that show up against the art tray backgrounds
- 6 x Dry wipe pen erasers
- 1 x Glue stick (for preparation)
- 1 x Scissors (for preparation)
- 12 x A4 laminating sheets and a laminator (for preparation)
- A colour printer (for preparation)
Preparation:
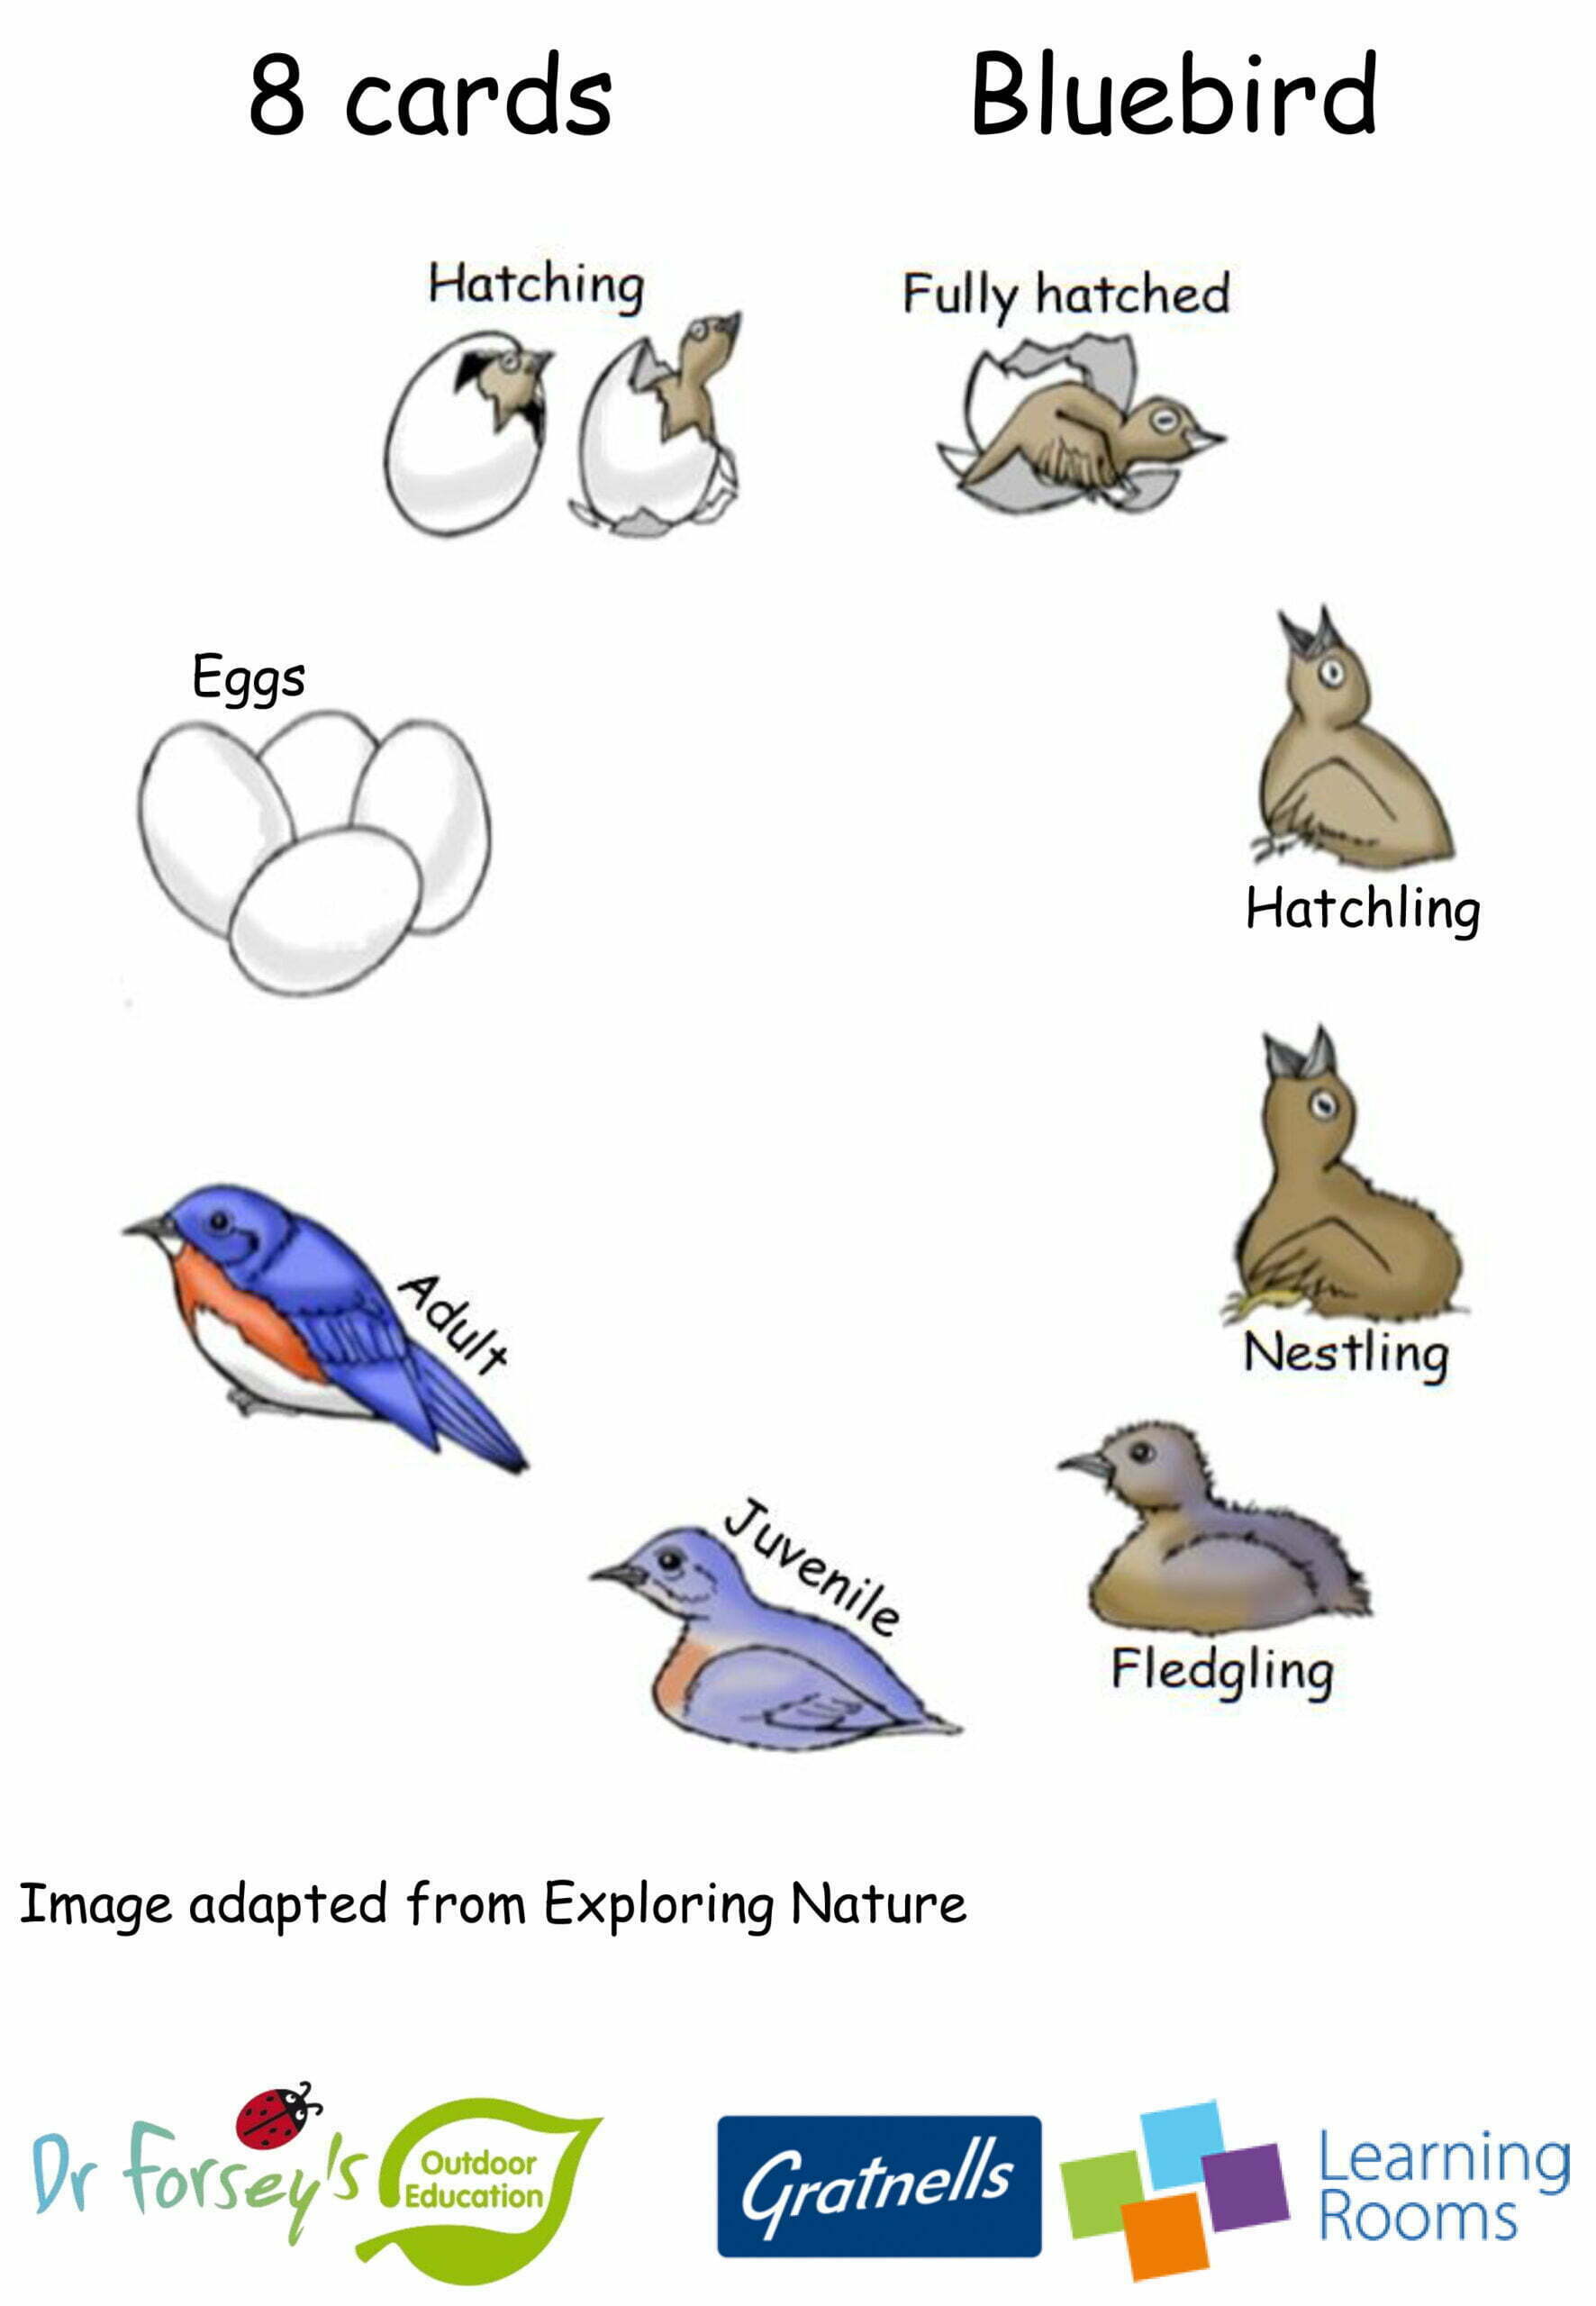
- Print two copies of the life cycle diagrams in full colour.
- Stick each life cycle back to back with a coloured sheet, e.g. stick the bluebird life cycle back to back with the purple sheet.
- Repeat this for both copies, keeping the colour and life cycle pairs consistent, e.g. bluebird always goes with purple backing.
- Cut out one set of the life cycle diagrams, cutting around each life cycle stage e.g. on the bluebird sheet, cut out all 8 stages, retaining the labels for each stage. Repeat for each life cycle.
- Cut out the title strip for each life cycle, e.g. ‘8 cards Bluebird’
- Laminate each piece you have cut out.
- Retain the title strip for each life cycle.
- Laminate the remaining set of life cycles with their coloured backing as a whole A4 sheet, these will form your answer sheets.
- Spread the cut out, individually laminated life cycle stage images around your outdoor space, either randomly or in species clusters around their habitat areas, e.g. bluebird around the base of a tree, dragonfly around a pond.
- Place one title strip into each art tray.
- Add one dry wipe pen and eraser to each art tray.
Once prepared, this activity can be repeated as many times as needed without the need for any additional consumables. It works with as few as six participants or with up to a maximum of 30.
What to do:
- Split the participants into six teams.
- Give each team an art tray, which should contain a title strip, dry wipe pen and eraser.
- Tip: you may wish to place the life cycles with the most stages nearer to their trays so there is less distance to travel, and vice versa. This will help to even out how long it takes each team to complete each life cycle.
- Run a relay race. Each team member is released from their art tray in turn to find a correct life cycle piece, bring it back and place it in their art tray before the next team member is released. They can either work out which pieces they are looking for from the name of their lifecycle (on their title strip, e.g. bluebird), or by matching the colour found on the back of their title strip (e.g. purple).
- Once all the life cycle pieces have been collected (the number of pieces required for each life cycle is displayed on the corresponding title strip), or while they are being collected if they want to try to get ahead, the team should work together to recreate the life cycle.
- Use the dry wipe pens to write arrows on the bottom of the art tray to link each stage of the life cycle together.
- When the life cycle has been completed the team should either sit down or all put their hands in the air to sign they have finished.
- Take a photograph of your life cycle trays to evidence your work.
- Hand out the answer sheets, or hide them under their corresponding art tray before the activity starts.
- The teams should compare their answers to the answer sheets and make any corrections as necessary.
- Collect up or re-hide the answer sheet under the art tray.
- The participants should work together to re-hide their lifecycle cards roughly where they found them and wipe down their art trays to remove the dry wipe pen arrows. They should leave their art tray as they found it.
- Each team moves around to the next empty tray and looks at their new title card.
- Repeat the previous steps.
- Move around again and repeat the previous steps until all teams have completed all life cycles, or until you feel you have exhausted their attention.
- Look at all five complete life cycles as a group, discuss the similarities and differences between each life cycle.
Tidy up time:
- Check all life cycle stage pieces have been recovered.
- Collect all life cycle stages, title strips, answer sheets, dry wipe pens and erasers.
- Stack all the art trays and place the rest of the equipment into the top tray. Or have the participants carry the art trays back inside for you.
What is happening?
All species must reproduce to survive. Mammals, amphibians, insects and birds are born then grow older and bigger as they mature into adults, some go through several different lifecycle stages as they mature. Many will reproduce, creating offspring (a.k.a. children) of their own before they eventually die. The offspring follow the same life cycle as their parents. Birth, maturation, reproduction and death is one complete lifecycle. Some species reproduce only once before they die, some reproduce many times, some produce small numbers of offspring, some produce hundreds. Some life cycles last a very long time, red sea urchins, for example, can live for more than 200 years, Galapagos Giant Tortoise for more than 150 years and African elephants for more than 70 years. Some lifecycles are very short; the Mayfly exists as an adult for less than 24 hours and during this time it must find a mate and reproduce, the male Drone Ant life cycle is just 3 weeks long and their only function is to mate with the Queen Ant, once they have done this they die.
Species living in their natural environment rarely make it to their maximum possible age because of disease, predation or lack of food, water or shelter due to habitat destruction or competition from the same or other species. Some species have high infant mortality (death) rates and produce many hundreds of offspring in an attempt to ensure at least one or two survive long enough to be able to reproduce themselves. If an entire species consistently fails to reproduce, or individuals regularly die before they are able to reproduce, it’s numbers will decrease and that species may eventually become extinct.
Other things to try…
- Study and survey your local environment. Go on a minibeast hunt <hyperlink to our minibeast hunt lesson plan> or carry out some pond dipping <hyperlink to our pond dipping lesson plan> to see how many of the different species’ life cycle stages you can find in real life. What other plant and animal species did you find on your adventures?
- Do some research and create your own life cycle cards for different mammals, amphibians, insects, birds or plants found in your local environment and around the world. Stick them back to back with a different coloured sheet of paper, cut them out and laminate them to add them to your life cycle relay game. Don’t forget to make an answer sheet for each new life cycle too! Challenge your friends to re-create the new life cycles.
- Research using a variety of secondary sources to find out about the world’s longest and shortest living animals and recreate their life cycles.
- Explore the work of naturalists and animal behaviourists such as David Attenborough and Jane Goodall.
- Share your photographs of your completed life cycles and any new life cycles you have created on social media using #WhatsInMyTray.
Health & Safety
As with all Gratnells Learning Rooms What’s In My Tray activities, you should carry out your own risk assessment prior to undertaking any of the activities or demonstrations.