Fossil tray
This activity was created as part of a Gratnells What’s in my tray? CPD workshop for primary science teachers to support practical work and delivery of the curriculum. It can be carried out as a stand-alone activity for students or combined with other activities from the session to form a STEM carousel. If you would like to find out more about running this activity as part of a carousel, take a look at the CPD Workshops section of the Gratnells Learning Room website where you will find further details and example carousels.
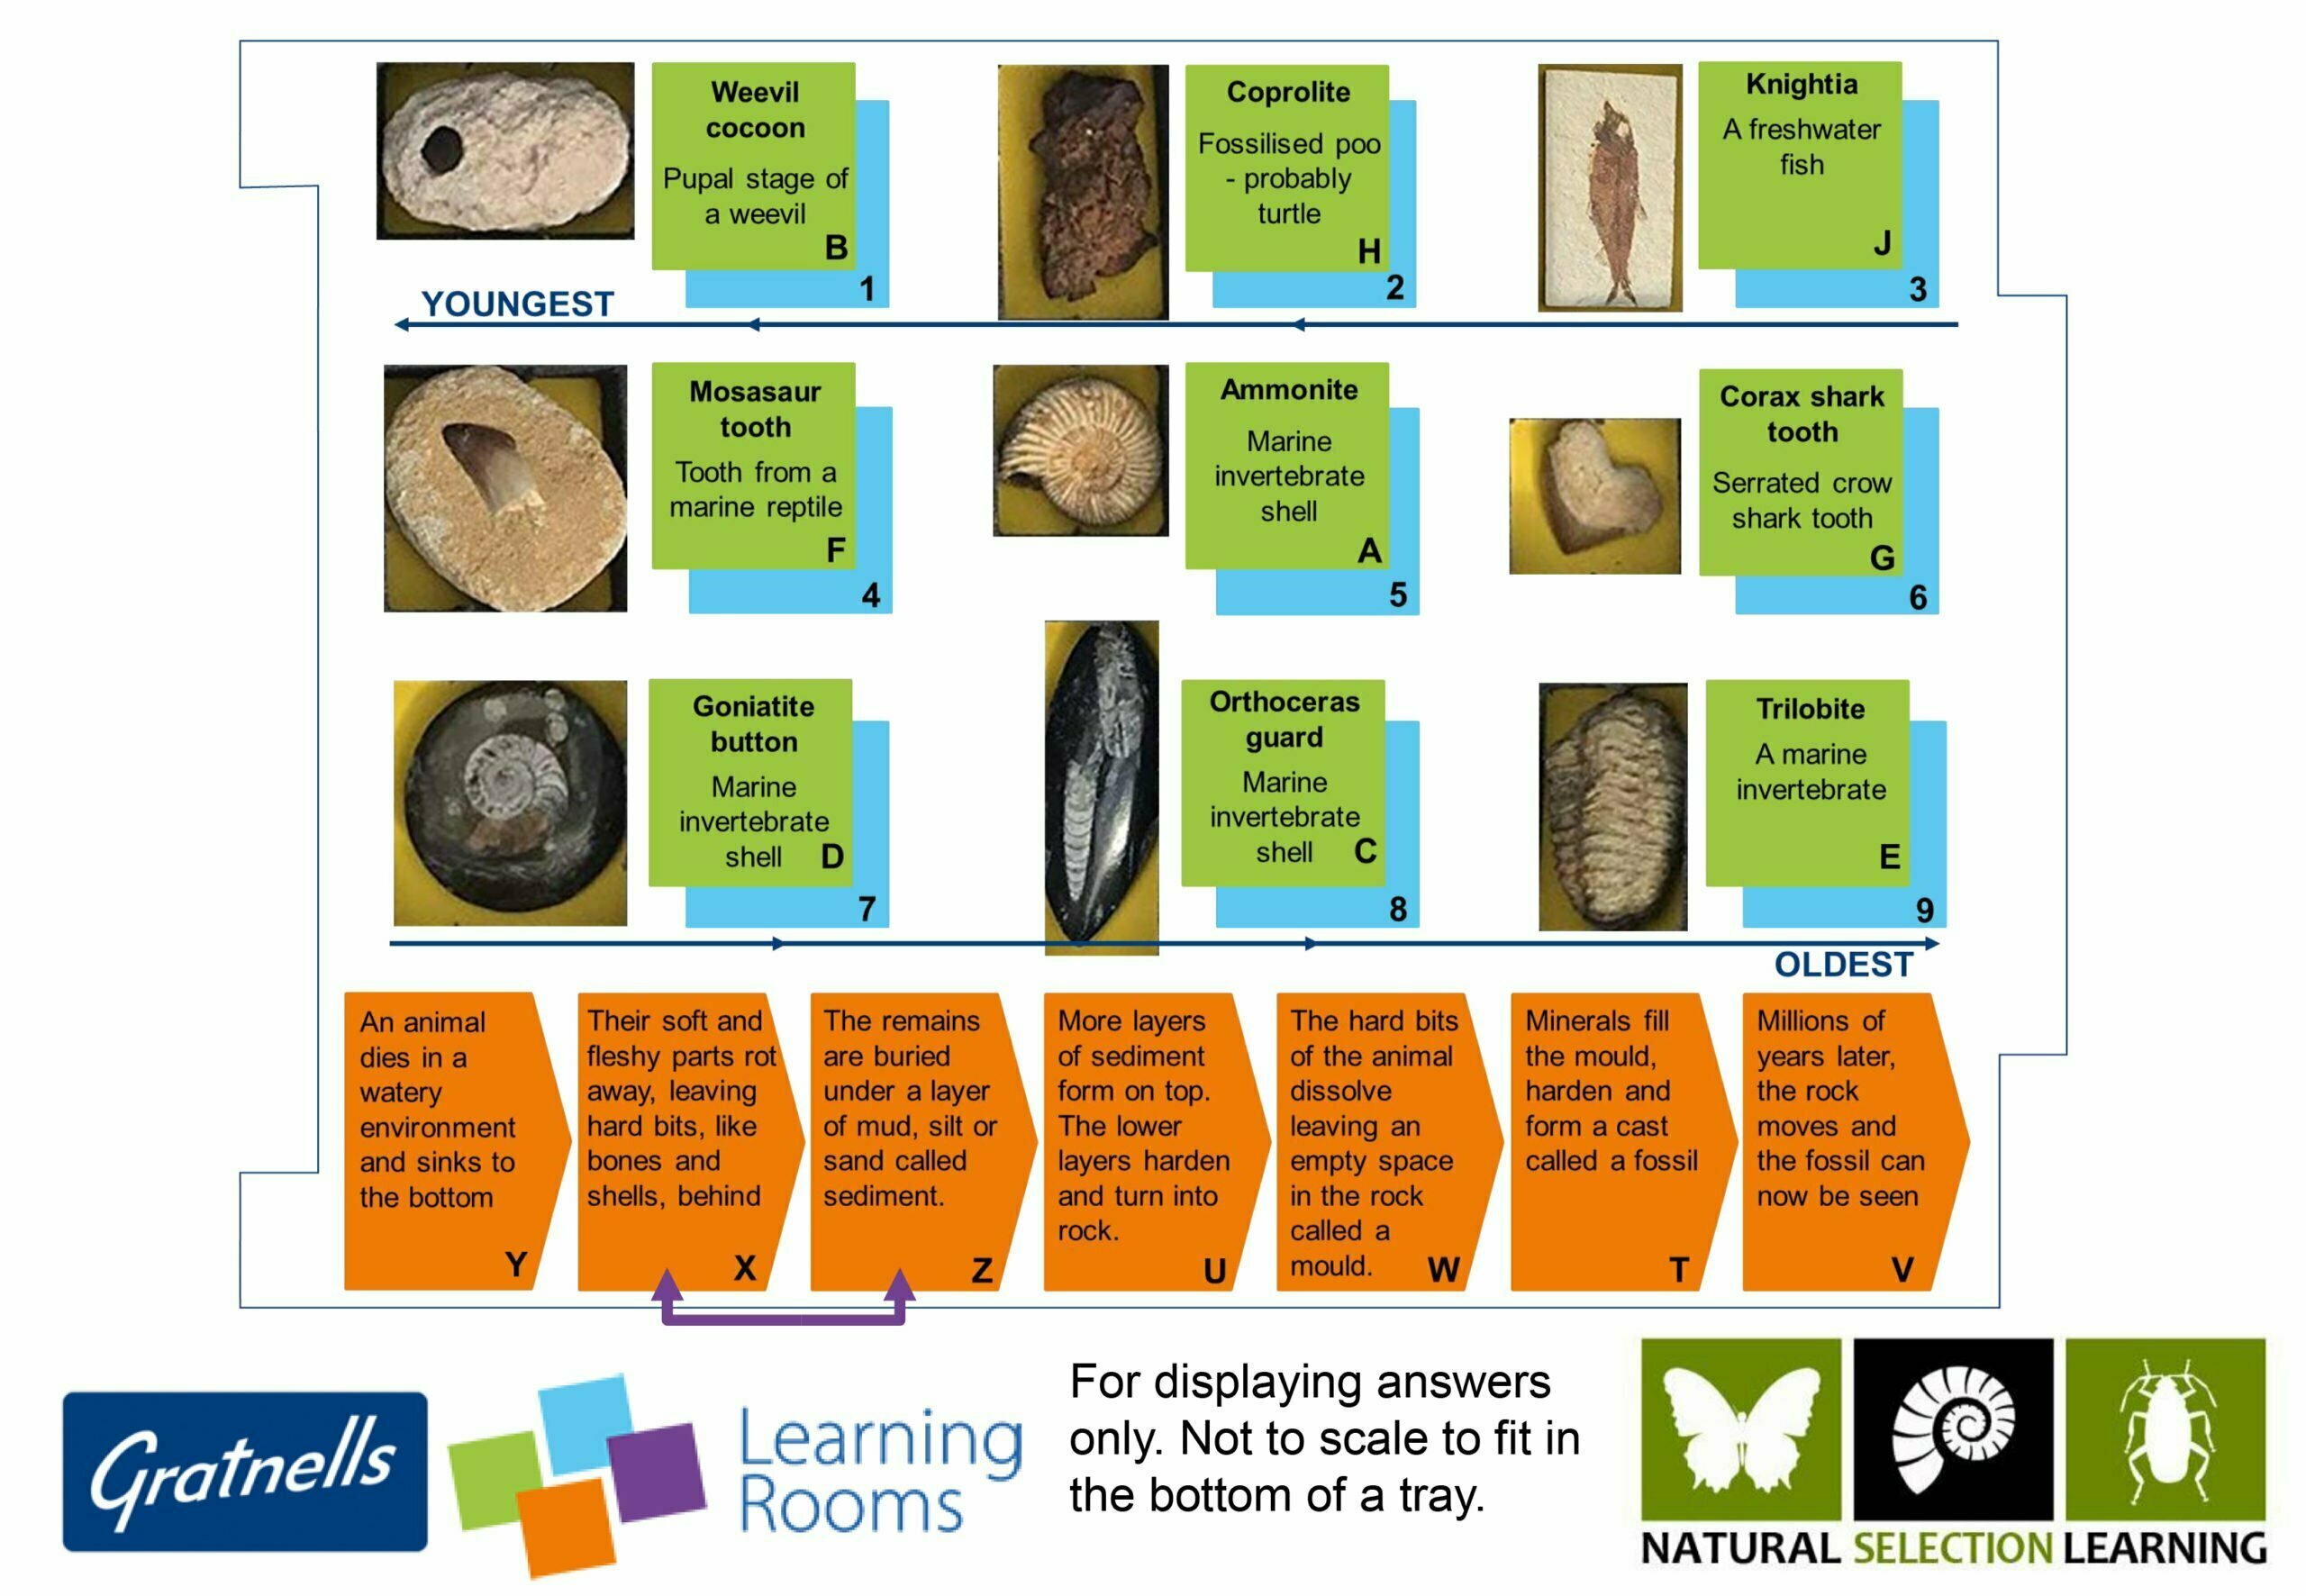
Fossils provide information about living things that lived on Earth millions of years ago. Can you uncover and identify some real fossils and work out how they were formed?
Learning outcomes
You will be able to:
- Explore and identify a variety of real fossils.
- Describe in simple terms how fossils are formed.
- Compare different fossils and discuss the type of information they provide about living things.
You will need (per group of 4):
- 1 x Fossils SmartCase® from Natural Selection Learning
- 2 x Shallow Gratnells (F1) tray with lid
- 1 x 4 section Gratnells tray insert or 4 x Blue SortED trays
- Play sand to half-fill a shallow tray
- 4 x Brush
- 4 x Spoon
- 4 x Magnifying glass or hand lens
- 1 x Set of name, description, age and fossil formation flow chart cards
- 1 x Activity sheet (A3)
- Paper and pencil, mini whiteboard and pen, or a tablet with camera for recording your answers
This activity also works for individuals or smaller teams, just increase the amount of time allocated to complete it. Once prepared, this activity can be repeated multiple times, reusing the same equipment for each team.
Preparation:
- Print, cut out and laminate (optional) one set of the name, description, age and fossil formation flow chart cards.
- Print (A3), cut out and laminate (optional) one tray sized activity sheet.
- Print and laminate (optional) one copy of the activity instructions or view them on any device.
- Half-fill a shallow tray with play sand, hide the fossils in the sand and put the lid on.
- Put the activity sheet in the second shallow tray and put the 4 section tray insert on top.
- Organise the different coloured cards and remaining equipment into the 4-section tray insert or blue SortEDs.
- Put the lids on.
What to do:
- Take the lids off the trays
- Lift out the 4-section tray insert to reveal the activity sheet hidden underneath.
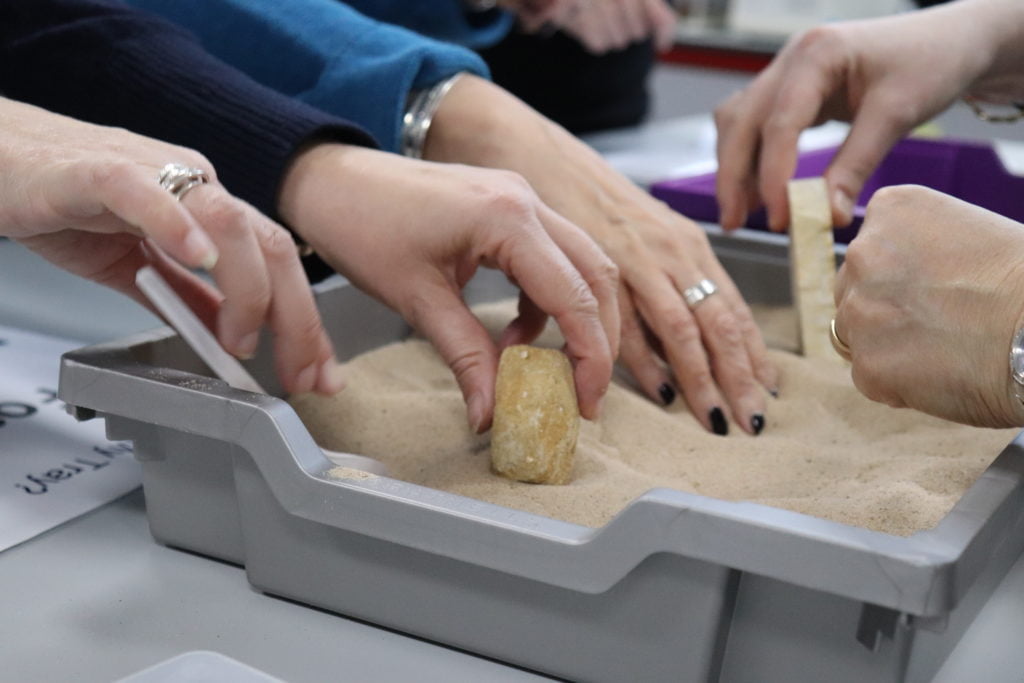
- Carefully search for real fossils in the sand using the spoons, brushes and your fingers.
- Gently place each fossil on top of its picture on the activity sheet in the shallow tray.
- Label each fossil with its blue age card by placing the card over the matching number on the activity sheet. Can you pronounce the name of each era?
- Read the green name and description cards. Work out which green card matches each fossil and place it on top of the blue card, next to its matching fossil.
- On your answer sheet, write down the letter you have matched with each number e.g. 8. C
- Reconstruct the orange Fossil Formation Flowchart and arrange it on the activity sheet.
- Record the letters and numbers of the matched fossils and their ages, e.g. 8. C. (See example answer sheet) or take a photograph.
- Take a photograph of your completed fossil activity tray to evidence your work, make sure the labels are visible.
Tidy up time:
- Carefully re-hide the fossils in the sand.
- Put the labels and equipment back neatly in the 4-section insert or blue SortEDs.
- Put the 4-section insert back on top of the activity sheet.
- Replace the lids and instruction sheet.
When all participants/teams have completed the activity, swap answers with the next team and mark the answers. The activity leader will share the correct answers.
Example blank answer sheet:
Write down the number and letter pairs
- 3. 5. 7. 9.
- 4. 6. 8.
Flowchart –
Answers:
Write down the number and letter pairs
- B 3. J 5. A 7. D 9. E
- H 4. F 6. G 8. C
Flowchart – Y, X, Z, U, W, T, V also accept Y, Z, X, U, W, T, V
What is happening?
Fossils are the preserved remains of dead organisms. Fossils provide information about things that lived on Earth millions of years ago. Plants and animals can become fossils. It is very rare for something to be fossilised, only a small percentage of the organisms that lived in the past became fossils because the conditions have to be just right. The flowchart in this activity covers the steps required to create a fossil. To become fossilised the organism must have hard parts, like wood, bones, teeth, shells or other mineralised parts that will survive long enough to be buried and preserved. Organisms with only soft parts, like jellyfish, worms and slugs, are much less likely to leave a fossil. Compared the large numbers of soft-bodied organisms present in today’s environments, few organisms consisting of only soft parts can be found in the fossil record. Those fossils that do exist are rare and precious, providing valuable insights into past life on earth. For these reasons, we know a lot less about the full range of soft-bodied organisms that once inhabited our planet and fossils do not provide a complete record of all organisms that lived on earth. Fossils can tell us about how some species have evolved over time, many fossils closely resemble the organisms still alive on our planet today. We can look back in the fossil record to see how species have evolved and adapted and identify examples of species that are now extinct.
Please note: This activity introduces a misconception. Fossils are not found by looking in sand, they are usually found in sedimentary rock. Around the coast of the United Kingdom there are several hot spots, including clay pits and chalk cliffs, where you can find fossils if you search through the rocks (always consider safety if you are going fossil hunting). There are other hot spots of sedimentary rock around the world where certain types of fossils can be found, look up the Morrison formation in North America and Canad’s Dinosaur Provincial Park.
Other things to try…
- Choose your favourite fossil and research it using secondary sources. Share what you found out with others via a simple report or presentation.
- Make some fact cards or a top trump card for each fossil and use them to create a display.
- Look closely at the fossils, what information do they provide about the organisms the were formed from and the environments in which the lived?
- What other types of fossils have been found? Find out about fossils that are too big to fit in your SmartCase and where you could go to see them.
- Pick a plant or animal that is now extinct (no examples of that organism current alive on our planet), how do we know it existed and what made it become extinct?
- Research Mary Anning, a famous English fossil hunter and palaeontologist.
- Share your photographs on social media using #WhatsInMyTray.
Health & Safety
As with all Gratnells Learning Rooms What’s in my tray? activities, you should carry out your own risk assessment prior to undertaking any of the activities or demonstrations. In particular, risks from small object choking hazards and sharp objects should be considered.