Stick skeletons
Use large art trays as a canvas for creating ephemeral models indoors or out.
You will need (per team of 4):
- 1 x Jumbo (F3) Gratnells Tray with lid
- 4 x Gratnells Art Tray (one in each colour if possible) (can substitute for A3 trays if needed)
- A wide variety of sticks and natural materials in different sizes collected from outdoors
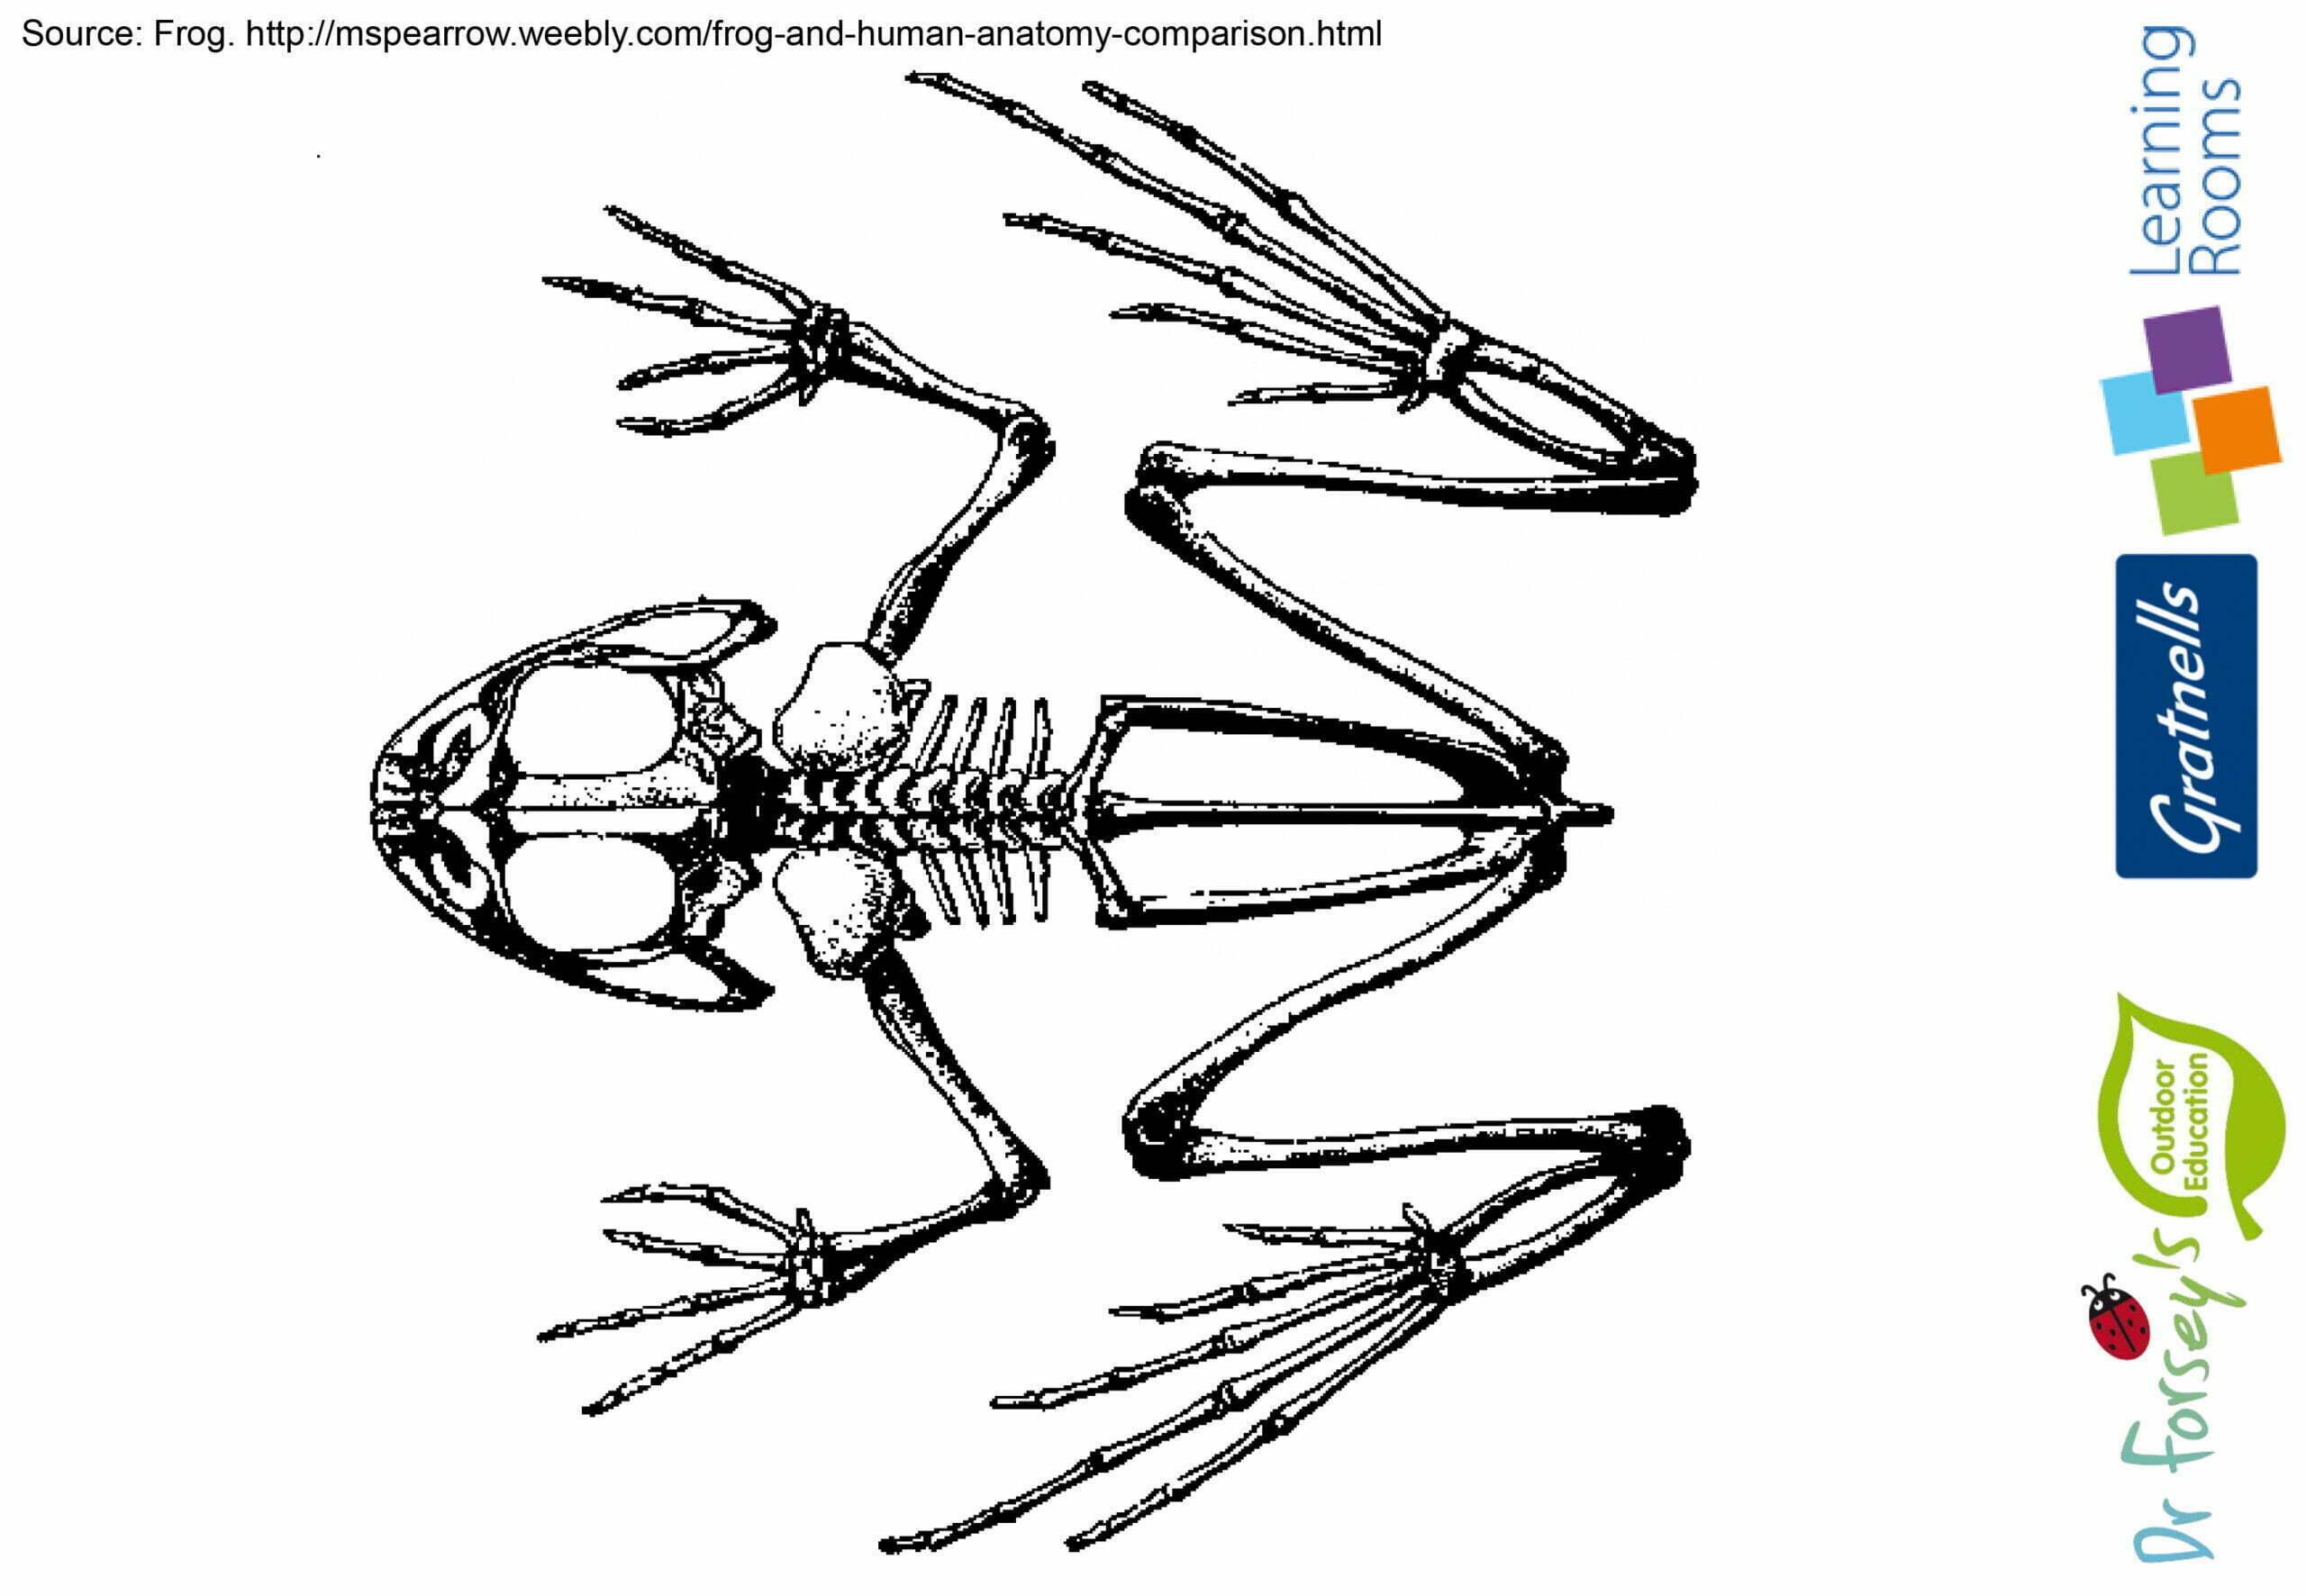
- Laminated skeleton pictures of four different animals
- Laminated parts and senses labels
- 4 x Gratnells mini trays or small re-sealable bags
Tip: Lamination is optional. This activity also works well outdoors (see ‘Other things to try’) so lamination helps to protect the printed materials from the elements.
Preparation:
- Print and laminate the whole skeleton pictures.
- Print, cut out and laminate the parts and senses labels and separate into four sets by colour.
- Collect a wide variety of sticks and natural materials in different shapes and sizes to completely fill the jumbo Gratnells tray and put the lid on. Tip: Sticks should be shorter than the length of the jumbo tray, so it is possible to lie them down in the bottom of the tray. Collect enough materials to recreate the four skeletons, one in each art tray.
- Place each set of parts and senses labels into its own mini tray or resealable bag.
- Stack the four art trays and place the labels and skeleton pictures inside the top art tray.
- Put the jumbo tray into the top art tray.
This activity also works as an individual challenge, just increase the amount of time allocated to complete it. This activity can be repeated as many times as required.
What to do:
- Explore the natural materials, skeleton pictures and labels.
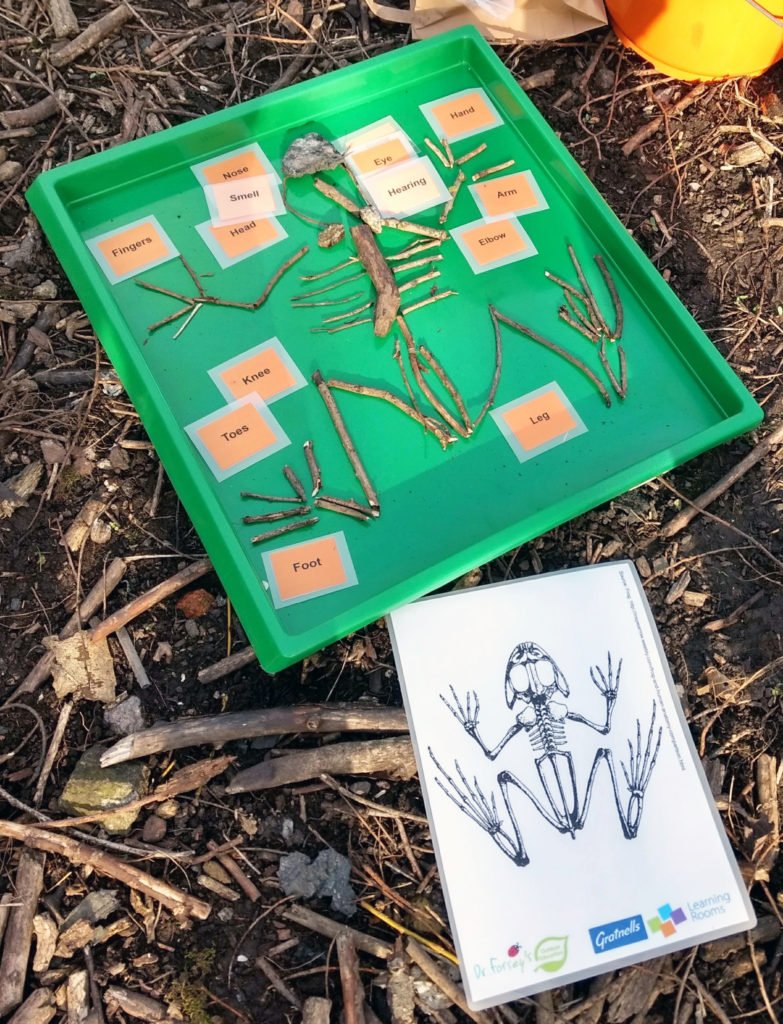
- Using one art tray for each animal, build a stick skeleton model for each animal using the natural materials provided. Use the pictures to guide you.
- Label each model using one set of coloured labels per model (some labels will not be appropriate for all animals).
- Take a photograph of each labelled model to evidence your work.
Tidy up time:
- Put all the natural materials back into the jumbo tray.
- Group each set of coloured labels back into its own bag or mini tray.
- Stack the art trays on top of each other.
- Place the labels, animal pictures and jumbo tray into the top art tray.
Other things to try…
- This activity is perfect to do outdoors. Take your art trays, animal pictures and parts labels to a shady area with lots of brash (sticks and other natural materials) on the ground. Allocate each team one tray and one animal picture. Challenge the group to collect their own natural materials to build a model of their animal in their tray. Hand out the labels of the parts and ask them to label each part. For an extra challenge, ask each team to hide their animal picture under their tray. Have a small art show/exhibition touring each model and challenging the participants to identify each animal by only looking at the models. Can they guess correctly? Alternatively, ask each team to collect up their labels, tip out their natural materials and move around to the next tray to complete another animal model. Rotate as many times as engagement levels allow or until all models have been completed by all teams.
- Add extra animal pictures to the challenge, the more unfamiliar the animal the more difficult the challenge! You could include insects and other invertebrates. The teams would then be making a model of the animal’s body shape and parts rather than its skeleton.
- Share your photographs on social media using #WhatsInMyTray
Health & Safety
As with all Gratnells Learning Rooms What’s In My Tray activities, you should carry out your own risk assessment prior to undertaking any of the activities or demonstrations.