SortED mystery materials
This activity was created as part of a Gratnells What’s in my tray? CPD workshop for primary science teachers to support practical work and delivery of the curriculum. It can be carried out as a stand-alone activity for students or combined with other activities from the session to form a STEM carousel. If you would like to find out more about running this activity as part of a carousel, take a look at the CPD Workshops section of the Gratnells Learning Room website where you will find further details and example carousels.
Explore the tray of mystery materials, group, sort, identify, name and match them to their uses.
Learning outcomes
You will be able to:
- Group, sort and identify a variety of everyday materials.
- Identify and discuss the different uses of everyday materials.
- Provide examples of different materials that are used for the same thing.
You will need (per group of 4):
- 1 x Deep Gratnells (F2) tray with lid
- 11 x Gratnells SortED modules (1 purple and 10 green) or 1 x Shallow Gratnells (F1) tray with an 8 section insert
- A varied collection of everyday materials including examples of wood, metal, plastic, glass, brick, stone, rock, paper, cardboard, rubber.
- 1 x Set of labels for material names (blue cards)
- 1 x Set of labels for material uses (orange cards)
- Paper and pencil, mini white board and pen, or a tablet with camera and appropriate App for recording your answers
Tips: Collect ‘interesting’ examples of different materials over time to add to your collection, these could be diverted from recycling and cleaned/sanitised before use in this activity. Pick small things that fit easily into the green SortED modules to help keep your activity nicely organised. All the examples we used were sourced from around the classroom or home, nothing had to be purchased specifically.
This activity also works for individuals or smaller teams, just increase the amount of time allocated to complete it. Once prepared, this activity can be repeated multiple times, reusing the same equipment for each team.
Preparation:
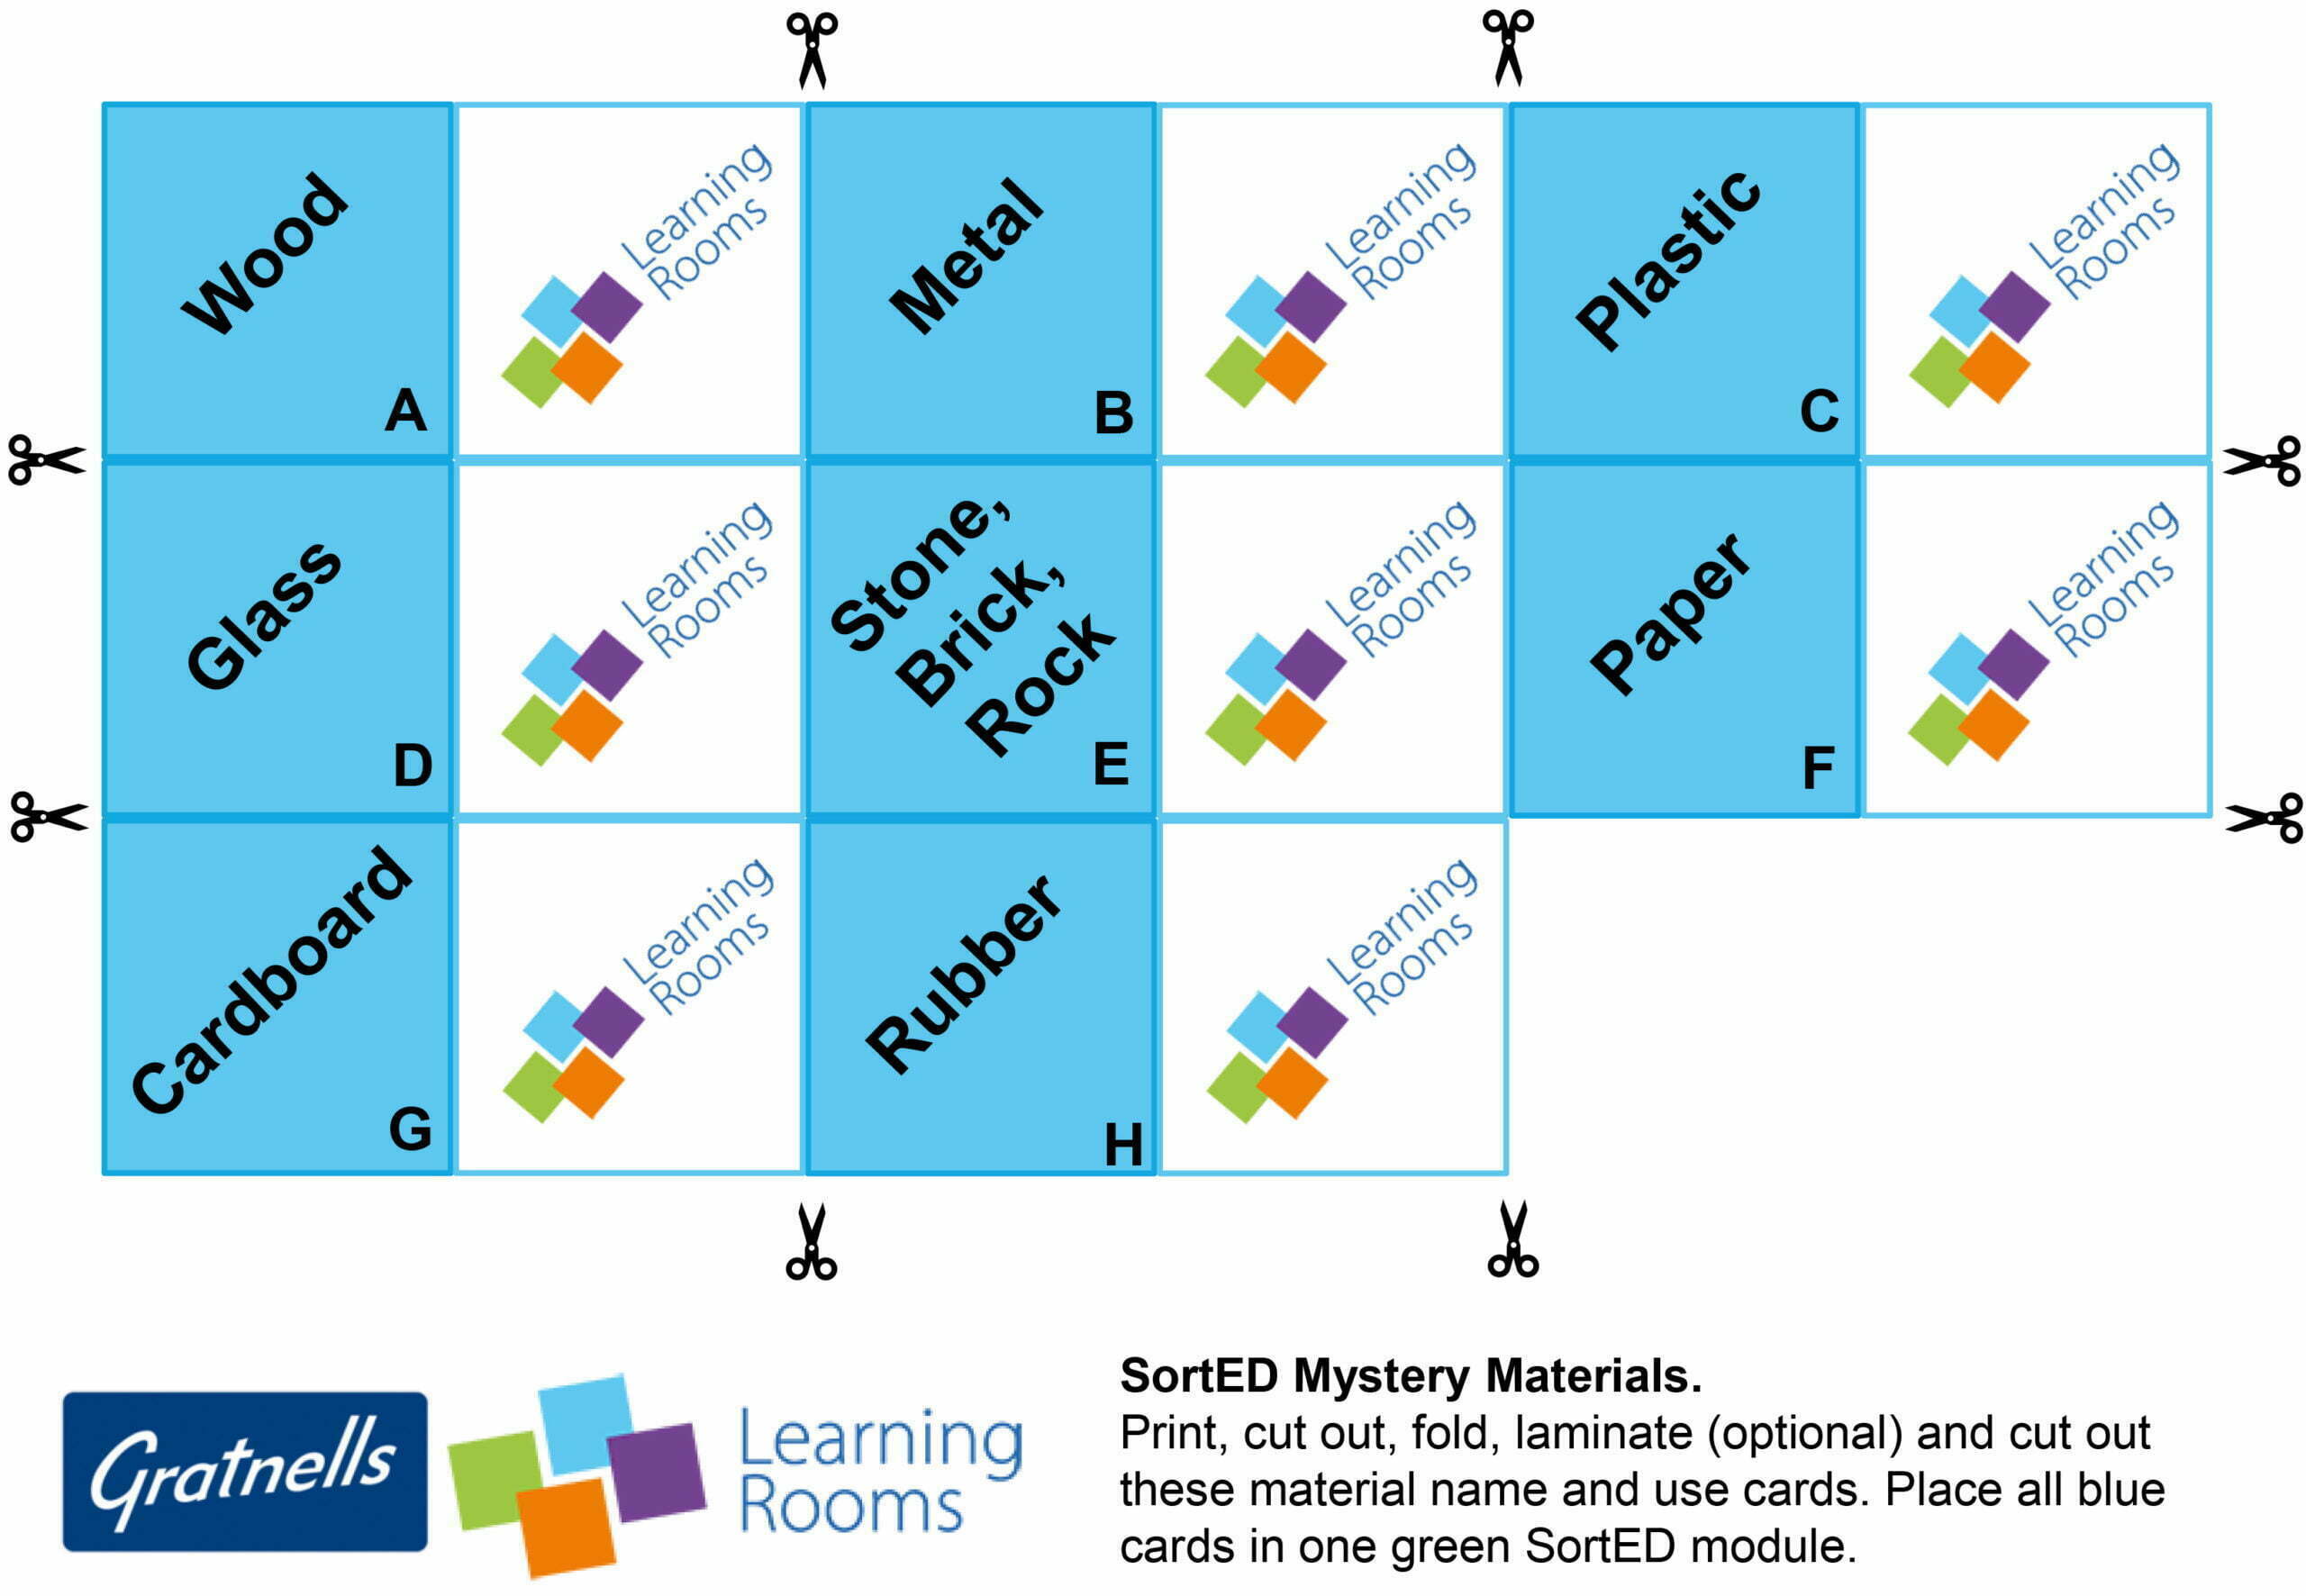
- Print, cut out and laminate (optional) one set of the labels for material names (blue cards)
- Print, cut out and laminate (optional) one set of the labels for material uses (orange cards)
- Put two green SortED modules into the bottom of the deep tray, put the blue name cards into one module and the orange uses cards into the other.
- Place all the everyday materials into the remaining space in the bottom of the deep tray.
- Put the empty purple SortED module into the deep tray
- Put the remaining empty green SortED modules into the purple module.
- Put the lid on.
What to do:
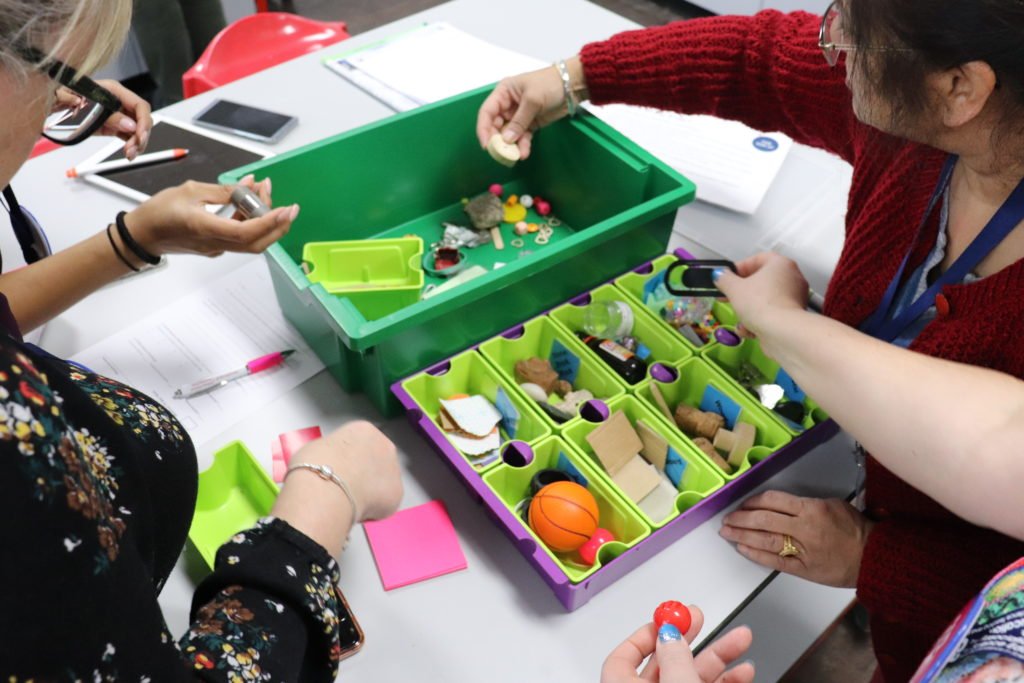
- Take the lid off the tray, lift out the entire purple SortED tray and its contents to reveal the mystery materials and labels hidden underneath.
- Place one blue material name label in or next to each of the eight green SortED modules in the purple tray.
- Explore, group and sort all the mystery materials into the labelled section that best describes the material they are made from.
- Take a photograph to evidence your work, make sure the labels are visible.
- Match each material to two orange example uses cards.
- Record the letters and numbers of the matched names and their uses, e.g. H, 5, 8. (See example answer sheet) or take a photograph.
Tidy up time:
- Return all items and labels to their original location.
- Replace the lid and instructions and leave everything tidy ready for the next team.
When all participants/teams have completed the activity, swap answers with the next team and mark the answers. The activity leader will share the correct answers.
Example blank answer sheet:
Write down the two numbers you have matched with each letter (16 points available, 2 per answer)
A. C. E. G.
B. D. F. H.
Answers:
Write down the two numbers you have matched with each letter (16 points available, 2 per answer)
A. 3, 4 C. 1, 10 E. 12, 15 G. 9, 14
B. 6, 11 D. 7, 16 F. 2, 13 H. 5, 8
Other things to try…
- Ask students to look for more examples of the different materials around your classroom and school grounds, what are they being used for? They could simply point them out or photograph them using a tablet and a free App like PicCollage to label their finds with the material name and use.
- To expand the activity, set a challenge to make their own cards for even more material types and their uses, e.g. natural and manmade fabrics, leather, ceramics or pottery, water, ice, leaves, chocolate.
- Discuss and describe the properties of the different items in the tray e.g. soft, rough, elastic, transparent, bumpy, smooth, opaque, natural, man-made, magnetic. Twinkl have some great ‘properties of materials posters’ that could help with this.
- Group and sort the materials into the green SortED modules by their properties or origins rather than their type. Make your own labels, or cut out the Twinkl ones, to label your newly sorted materials. How many different ways can you find to group and sort the items?
- Set a homework to look for different examples of these materials and examples of their uses in the home or garden.
- Share your photographs on social media using #WhatsInMyTray.
Health & Safety
As with all Gratnells Learning Rooms What’s in my tray? activities, you should carry out your own risk assessment prior to undertaking any of the activities or demonstrations. In particular, risks from small object choking hazards and sharp objects should be considered.