
Density column
This activity was created as part of a Gratnells What’s In My Tray CPD workshop for secondary science technicians to support practical work and delivery of the curriculum. It can be carried out as a stand-alone activity for students or combined with other activities from the session to form a STEM carousel.
This idea for a What’s In My Tray activity was kindly provided by Georgina Peacock, Science Technician.
You will need (per team of 4):
- 1 x Extra deep Gratnells tray
- 1 x Gratnells art tray
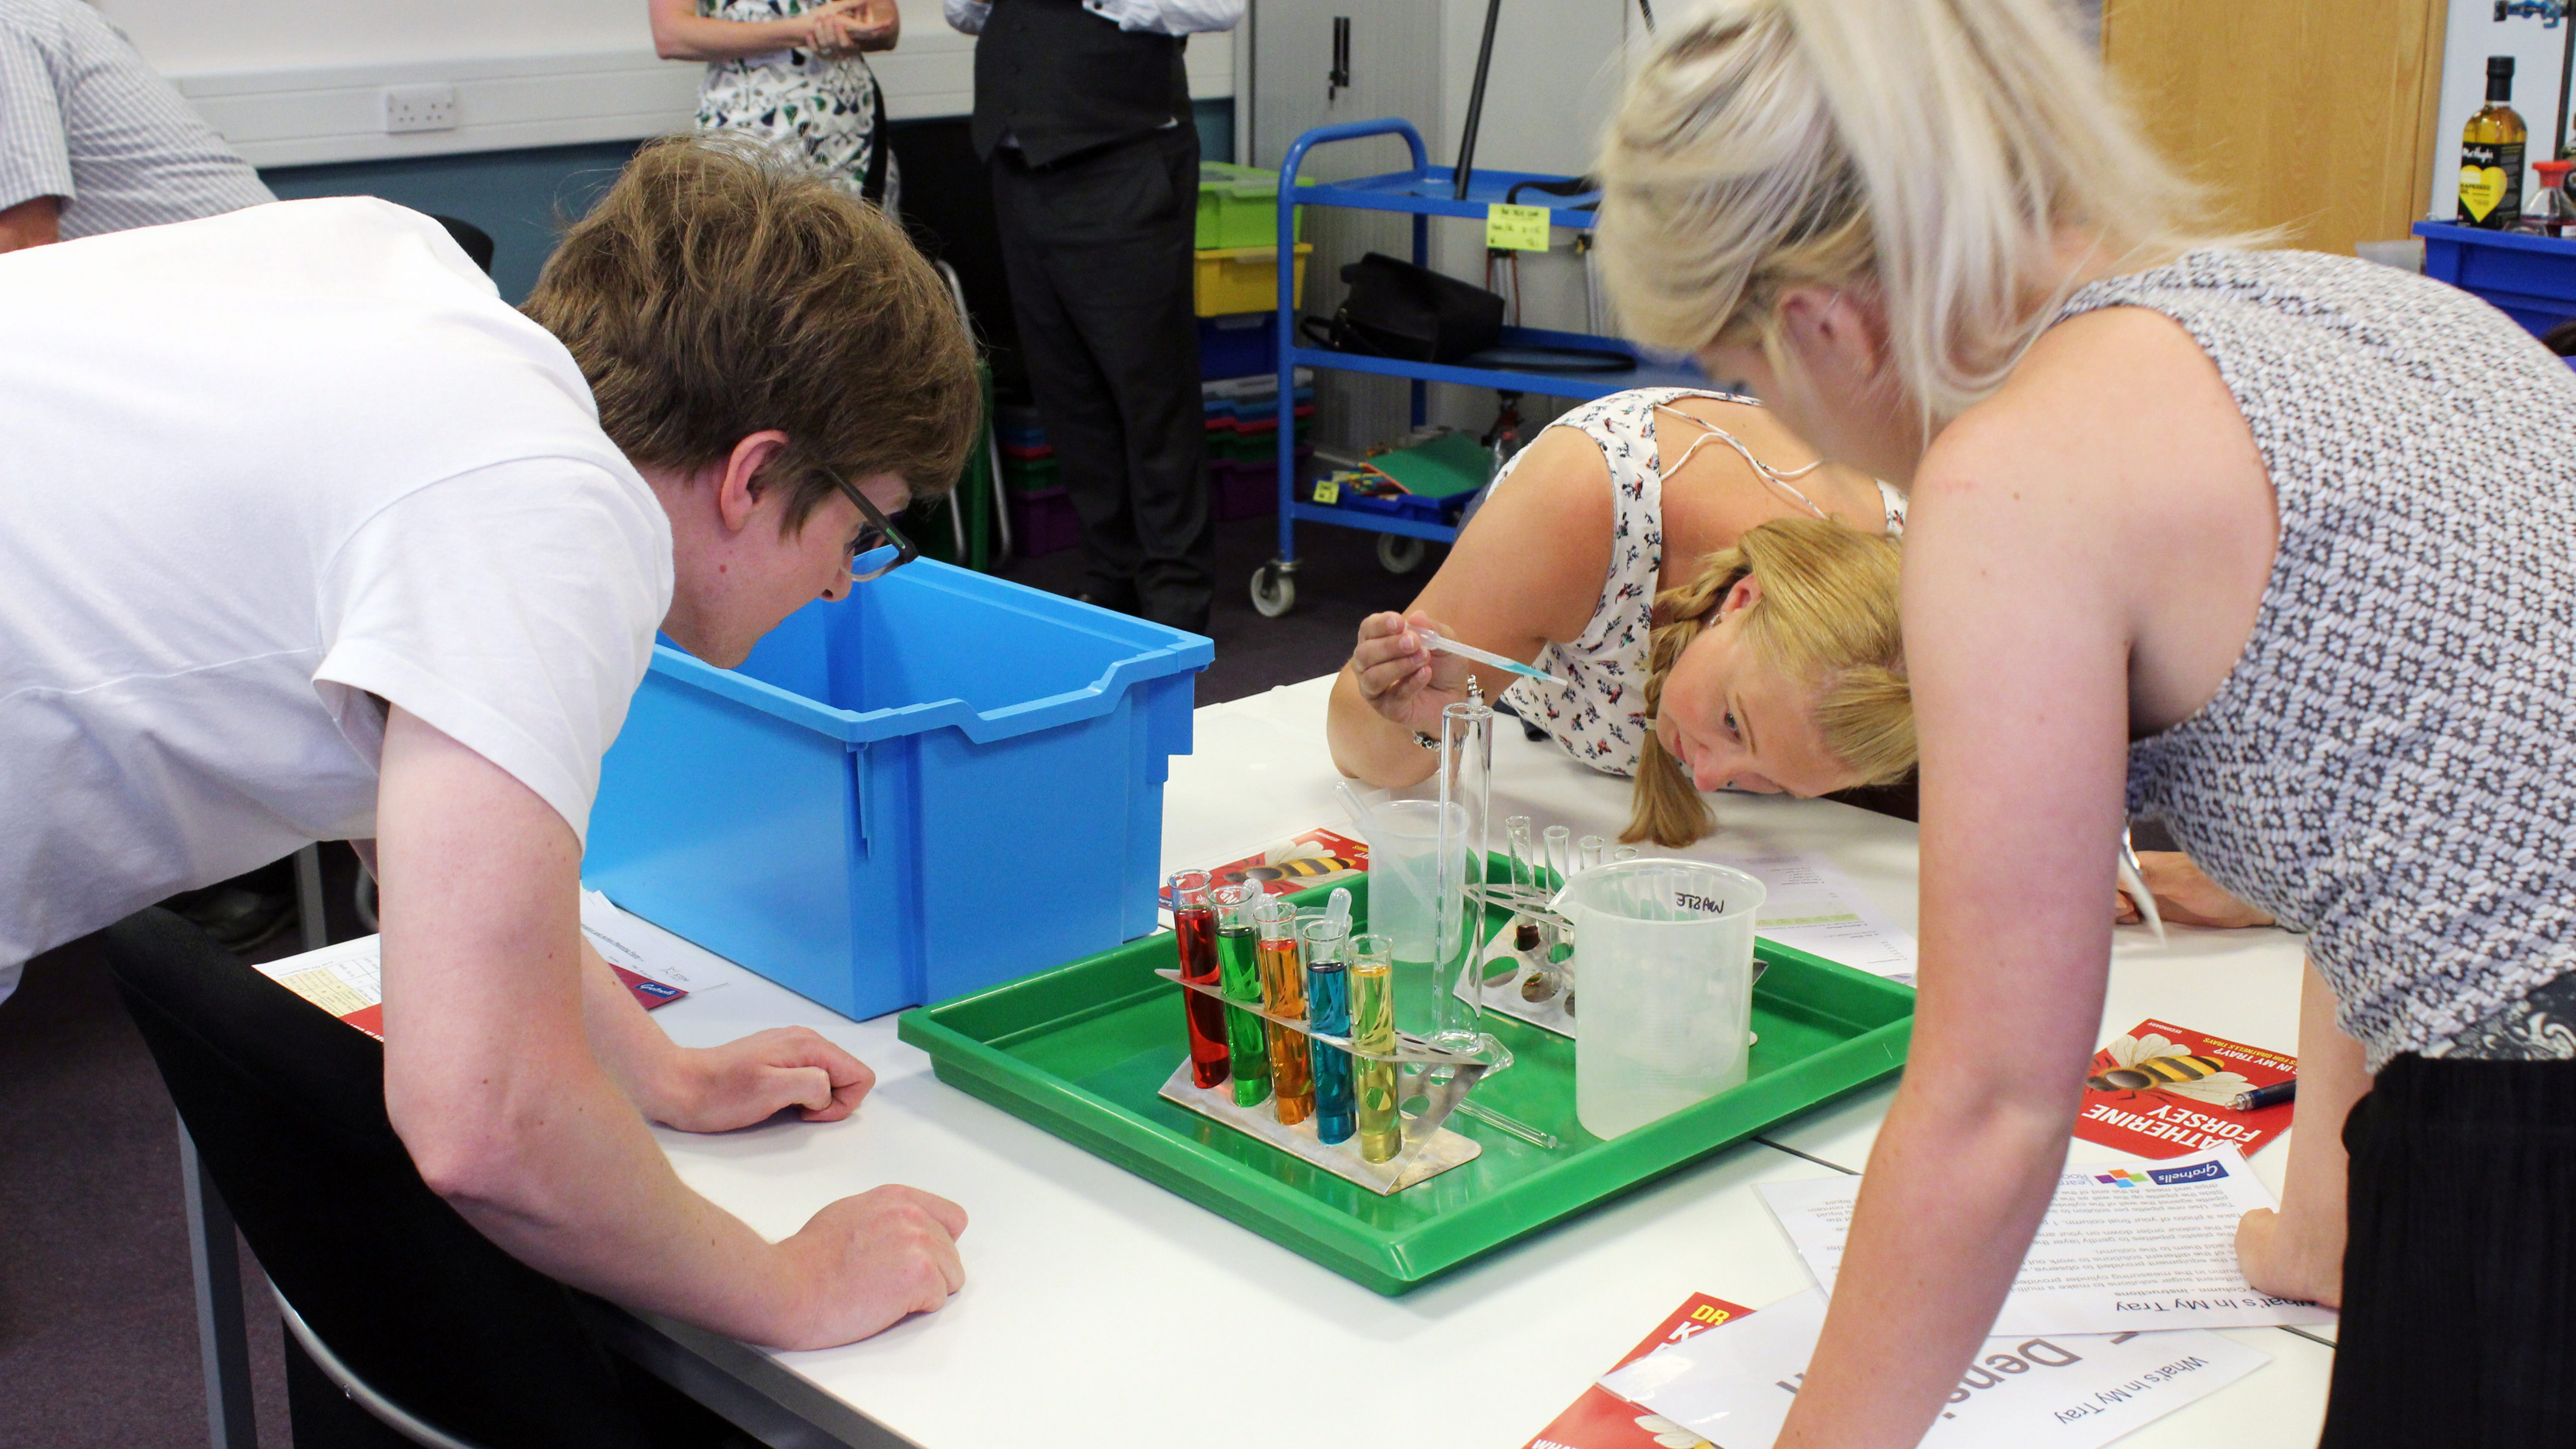
- 5 x Boiling tubes ~60ml capacity (each containing ~50ml of a different density/colour sugar solution)
- 5 x Test tubes ~20-25ml capacity
- 1 x Tube rack(s) to hold all tubes
- 1 x 200ml measuring cylinder for final layering/density column
- 1 x 500ml beaker for waste
- 5 x Plastic pipettes
- A selection of beans/beads of different weights/densities i.e. uncooked grains of rice, mung beans, marbles, plastic beads, dried peas.
This activity also works for individuals or smaller teams, just increase the amount of time allocated to complete it.
For making up the sugar solutions:
Makes sufficient solution for 5 teams to complete this activity.
- 260g (20 tablespoons) Granulated sugar
- 1.25L Hot tap water (care should be taken when working with hot water)
- 5 x Plastic cups/beakers or glass beakers sufficient to hold 250ml with plenty of room for stirring.
- 5 x Different food colourings or gels e.g. yellow, blue, red, green, orange
- 5 x Stirrers (glass rods, lollypop sticks or teaspoons)
- 1 x Tablespoon
- 1 x 250ml measuring cylinder
- 1 x Microwave
Preparation:
- Make up the sugar solutions in advance (should be carried out by an adult or under close adult supervision). Do not reveal to the activity participants which solution is which.
- Fill 5 cups with 250ml of hot tap water each.
- Colour the water using the same quantity of food colouring/gel for each cup. You need to make each cup a different colour, e.g. yellow, blue, red, green, orange. Use a separate stirrer for each cup to mix in the colour (or wash and dry one stirrer between cups).
- Put the yellow cup to one side, this will be your zero sugar solution.
- Add 2 level tablespoons sugar to the blue cup.
- Add 4 level tablespoons sugar to the red cup.
- Add 6 level tablespoons sugar to the green cup.
- Add 8 level tablespoons sugar to the orange cup.
- Stir each cup well to dissolve the ALL the sugar, again using the same separate stirrer for each cup to make sure you are not mixing the solutions.
- You will notice that by the red or green cup it will not be possible to dissolve all the sugar by stirring alone, this is because you have reached saturation point and no more sugar can move into solution. To get all the sugar to dissolve you will need to warm the water a little more and in doing so you will create a supersaturated solution.
- To do this, place the cup in to the microwave for 20 seconds, remove it and stir the solution again. Continue to repeat this process or warming and stirring well until all the sugar is dissolved. Repeat for each cup. Take care, the solutions may get hot.
- Once all the solutions are made, allow them to cool before gently adding 50 ml of each solution to the boiling tubes.
- Put 5 filled boiling tubes, one of each colour, into a tube rack.
- Place all the equipment, including one tube rack containing one set of sugar solutions, into the extra deep tray and put the lid on.
- Place the art tray next to the extra deep tray. Tip: Teams should work in the art tray to catch any mess, drips or spills.
What to do:
- Approach the tray and lift the lid.
- Use the 5 different sugar solutions to make a multi-layered density column in the measuring cylinder provided.
- First, use the equipment provided to observe, explore and experiment with small amounts of the different solutions to work out their order of density and the order you will add them to the column.
- When you are ready, use the plastic pipettes to gently layer the solutions into the measuring cylinder.
- Write the colour order down.
- Take a photo of your final column.
- Tips: Use one pipette per solution to avoid mixing. When layering, keep the tip of the pipette against the wall of the cylinder, a little above the surface of the rising liquid. Slide the pipette up the wall as the liquid level rises. Add equal volumes of each liquid to produce the most striking column. Work in the art tray to contain drips and mess.
- At the end of the activity, use your large beaker for all waste liquid and the cloths to wipe up any spills.
What is happening?
Density is a measure of how many molecules are packed into the same volume. In this case, how many sugar molecules are dissolved in the same volume of coloured water. The equation for this is density = mass (of sugar) ÷ volume (of water). As we increased the amount (mass) of sugar we added to the solution we increased its density because we kept the amount (volume) of water we used constant. When sugar dissolves, its molecules take up space between the water molecules. The more sugar we pack in the denser the solution becomes. There is only so much space available between the water molecules, when all the spaces are full we say the solution is saturated and no more sugar will dissolve. However, when we heat the solution, the molecules of water move around more and create more spaces, this allows more sugar to dissolve and helps us to create the supersaturated solutions.
When you are testing your solutions to determine their density, you may notice that if you simultaneously drop a dried rice grain into each of the five solutions, they fall at different speeds. This is because in a higher density solution there are more molecules in the way of the rice grain, slowing its fall to the bottom of the tube. The denser the solution the slower the fall, you can use this science knowledge to compare the density of any two solutions.
Lower density solutions ‘float’ on higher density solutions. You will see this as you layer your liquids and create your column.
Other things to try…
- What happens when you shake the measuring cylinder containing the completed density column? Why?
- Repeat the activity using something other than sugar to make your solutions, e.g. salt or cornflour.
- Experiment with other common household liquids e.g. golden syrup, honey, sunflower oil, surgical spirit, milk, washing up liquid, nail varnish remover. You may wish to colour any liquids that are clear with food colouring to give you a more visual result. Can you create a density column using these liquids? Try adding solid objects such a dried beans, rice grains, a screw, a plastic bead or Lego head to the completed column. Add them carefully, one at a time, and watch what happens. Do they all sink to the bottom?
- Share your photographs of your completed density columns on social media using #WhatsInMyTray
For more images and videos of this activity taken at the National Technicians Conference in York see here.
Health & Safety
As with all Gratnells Learning Rooms What’s In My Tray activities, you should carry out your own risk assessment prior to undertaking any of the activities or demonstrations. In particular for this activity, you should consider all risks associated with working with hot water while making up supersaturated sugar solutions.